


Key Takeaways
- Understand the different types of wood stains and their applications.
- Consider the wood species and its natural characteristics.
- Test stain colors on your specific wood before final application.
- Account for environmental factors and project location.
- Choose the appropriate stain opacity for your desired finish.
Interoduction
Selecting a wood stain goes beyond simply choosing a shade—it plays a vital role in shaping your project’s look and durability. The right stain highlights the natural grain while acting as a protective barrier against moisture, sunlight, and daily use. For outdoor projects, such as decks or log furniture, opting for a stain that protects the logs is especially important. Whether refinishing exterior pieces or enhancing indoor cabinetry, mastering stain basics ensures lasting, beautiful results.
Deciding on the ideal wood stain can seem overwhelming, with numerous formulations and finishes on the market. The right choice will depend on several factors: the kind of wood you’re working with, your functional needs, where the piece will live, and the ultimate look you envision. Knowing these considerations helps guide your selection process, ensuring your project looks stunning and lasts for years.
Understanding Wood Stain Types
Wood stains are formulated to bring out the best in your project—each type designed to address different needs and applications:
- Oil-Based Stains: These stains are known for their deep penetration, imparting rich color while offering enhanced durability. Ideal for surfaces that need to withstand frequent use, oil-based stains require extra drying time but often result in a more robust protective layer. This makes them perfect for flooring and outdoor applications.
- Water-Based Stains: Water-based stains are the way to go if you’re looking for fast drying times and environmental friendliness. They’re less odorous, offer a wider color selection, and are easier to clean. However, they can raise the wood grain, which may necessitate additional sanding for a smooth final finish.
- Gel Stains: With their thick, pudding-like consistency, gel stains sit atop the wood more than they penetrate. This helps achieve uniform coverage, even on woods prone to blotching. They’re handy for vertical surfaces or woods such as pine and maple, which can be unpredictable in how they absorb stain.
Assessing Your Wood Species
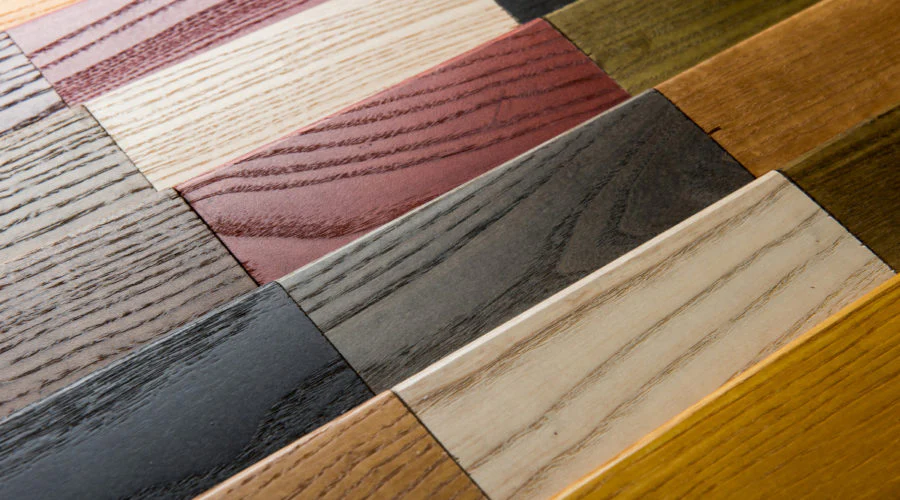
Different wood species absorb stains in unique ways due to variations in grain and density. For instance, oak—known for its open pores—takes stain readily and evenly, resulting in a classic finish. Softer woods like pine, with tighter grains and resinous properties, often absorb stains unevenly, leading to a blotchy look. Before committing to a stain, test it on scraps of your project wood to see how it looks.
As recommended by experts, always factor in wood character when planning your finish. Each species’ distinct traits can dramatically affect your project’s outcome, and testing in advance ensures a result that meets your expectations. You can learn more about how specific woods respond to stains at the Family Handyman wood stain guide.
Testing Stain Colors
While stain manufacturers provide color samples, the results often vary due to wood grain, species, and previous treatments. The most reliable way to visualize your finished product is by staining a piece of leftover wood from your project or an inconspicuous area. Adjust application technique, layering, and drying times to fine-tune the effect. Matching expectations to reality at this stage saves time and frustration later.
Considering Environmental Factors
The intended location of your finished piece should influence your stain choice. Outdoor furniture, decks, and siding are regularly subjected to sun, rain, and humidity, making them vulnerable to fading, cracking, and moisture damage. Opt for stains specially formulated with UV blockers and waterproofing agents for these situations. Indoor projects, on the other hand, have fewer exposure concerns, allowing for more priority on appearance and feel rather than protection alone.
Choosing the Right Stain Opacity
Opacity greatly influences both appearance and protection. Here’s what you need to know:
- Translucent: This type of finish provides a subtle color tint and is best for highlighting the intricate depth and character of high-quality wood grains.
- Semi-transparent: This type offers a balance of color enhancement while retaining most of the natural grain’s visibility. It is popular for decks and siding.
- Semi-Solid: Provides more coverage, concealing slight imperfections while showcasing some wood grain and texture.
- Solid: This type delivers the most dramatic transformation, masking most grain patterns but allowing a hint of texture to shine through—ideal for older, weathered wood.
For more in-depth insight on stain opacities and choosing the right fit, consult Family Handyman’s stain guide.
Application Tips
Surface Preparation
Begin by sanding your wood thoroughly to open the grain and remove imperfections. Next, wipe away all dust with a tack cloth or vacuum for optimal stain absorption.
Application Methods
Choose brushes, clean rags, or sponges according to your chosen stain type and always refer to the manufacturer’s guidance. Even coverage and careful attention along edges and corners lead to a more professional result. Work in manageable sections and maintain a wet edge to avoid lap marks.
Allowing Adequate Drying Time
Most stains require at least 24 hours to dry between coats, though humidity and temperature can affect this. Rushing the process can lead to a tacky, uneven finish. Multiple thin coats are often better than one heavy coat—the extra time is worth the flawless result.
Conclusion
Choosing the right wood stain means blending a clear understanding of stain types, carefully assessing your wood, and thoughtful consideration of environmental exposure. Testing ahead of time and following best application practices guarantees beautiful and resilient results, ensuring your woodworking project is enjoyed for years to come. For further guidance on perfecting your woodworking projects, visit Family Handyman’s guide to staining wood.